New to Thankyou Payroll? Or simply want a reminder on how to set up an employee's profile? This guide will tell you how.
In this article, we will look at each of the tabs in the Employee Profile so you will set up your employee correctly. Use the article index below to move to different sections in this article.
In this article:
- Before you start - information to have at hand
- How to locate the Employee Profile
- Completing the Employee Profile Tab (basic employee details)
- Completing the Standard Pay Tab
- Completing the Pay Types Tab
- Completing the KiwiSaver & Child Support Tab
- Completing the Leave Tab
- Completing the History Tab
- Completing the Contact Tab
- Completing the Fines & Payments Tab
- Completing the Giving Tab (for payroll giving)
Before you start - information to have at hand
.png?width=52&height=52&name=Info%20-%20Blue%20Block%20(1).png) Pro Tip: As some of the sections in the Employee Profile will not allow you to SAVE and move on without being filled in, it helps having all the information needed at hand before you start.
Pro Tip: As some of the sections in the Employee Profile will not allow you to SAVE and move on without being filled in, it helps having all the information needed at hand before you start.
To get started, you should have the following information ready:
-
- The employee's first and last name
- The employee's start date
- The employee's IRD number
- The employee's name on the bank account
- The employee's bank account number
- The employee's email address for payslips to be emailed to
- The employee's pay rate
- The employee's tax code
- The employee's (KS2) and employers KS contribution rate
- The agreed leave method by both the parties. If you are unsure on this, please contact Employment New Zealand website for assistance.
Locating the Employee Profile
- To begin setting up a new employee, click on 'employees' from the top menu.
- Choose either "Employee Profile" or "Add New Employee" from the dropdown menu. Both will take you to the Employee Profile.
.png?width=608&height=242&name=EmployeeProfilePath%20(1).png)
There are some useful things to note about the Employee Profile Tab, where you will complete the employee's details.
3. You can add a new employee from within the Employee Profile.
4. You are able to access all your employees' profiles by clicking this button, or from the 'Employee List' in the Employee dropdown menu as seen above.
5. The Employee ID will be generated after the Employee Profile Tab is completed and SAVED. When first adding a new employee, this field will be blank.
.png?width=608&height=303&name=AddNewEmployee%20(1).png)
You can navigate away from editing employees at any time by clicking on any of the menus at the top of the screen.
Be sure to SAVE or Save + Next after completing each tab to avoid losing the information you have just entered.
Completing the Employee Profile Tab
The mandatory fields are marked with a red asterisk*.
The page will not save if these fields are not filled in.
Completing the Standard Pay Tab
On the standard pay page you will complete details for Standard Pay (Pay rate), Tax code, employee standard pay options as well as setting their default entries for a standard week of a timesheet (setting their work pattern).
.png?width=52&height=52&name=Did%20You%20Know%20-%20Green%20Block%20(1).png) As the Standard Pay Tab and the Leave Tab function together, we have a dedicated article showing you how to complete these tabs based on the employee's agreement type. Follow this link.
As the Standard Pay Tab and the Leave Tab function together, we have a dedicated article showing you how to complete these tabs based on the employee's agreement type. Follow this link.
The fields you have available to complete depend on how you enter the standard pay. This is the standard view:
When will this employee be paid?
Follow this link to set up your Pay Day Settings in our system.
Completing the Pay Types Tab
The Thankyou Payroll system comes pre-loaded with standard pay types you will use to pay salaries and wages, leave and most other payments. If you want to set up customised pay types to fit your business, this is where you set up extra payments or customise your own pay types that fall outside the standard pay types.
- These could be for allowances and deductions such as phone bills, accommodation, tools, and food for example. To find out more about taxable and non-taxable allowances, visit the IRD website.
- You could use this tab to set up pay types for back pay, correction pay, bonuses, and other pay rates (such as $22 per hour for puppy walking, but $25 per hour for puppy socialising). To find out how to set this up, follow this link to our Custom Pay Type How To article.
The KiwiSaver contribution rate boxes can either be left blank or have a rate added to them.
The boxes cannot have a 0 (zero) in them.
Follow this link to our dedicated article if you need further information.
Completing the Leave Tab
The Leave Tab is one of the most important parts of the employee's profile. Each leave method selected here uses a specific calculation, which means that they are not interchangeable. Changing leave methods after pays have been processed may cause calculation problems.
To assist with setting this up correctly, we have created two dedicated resources:
|
|
Please use these resources when completing this tab.
* If you are setting up a new permanent employee and you will have an annual closedown period within their first year of employment, please follow the instructions in our annual closedown article.
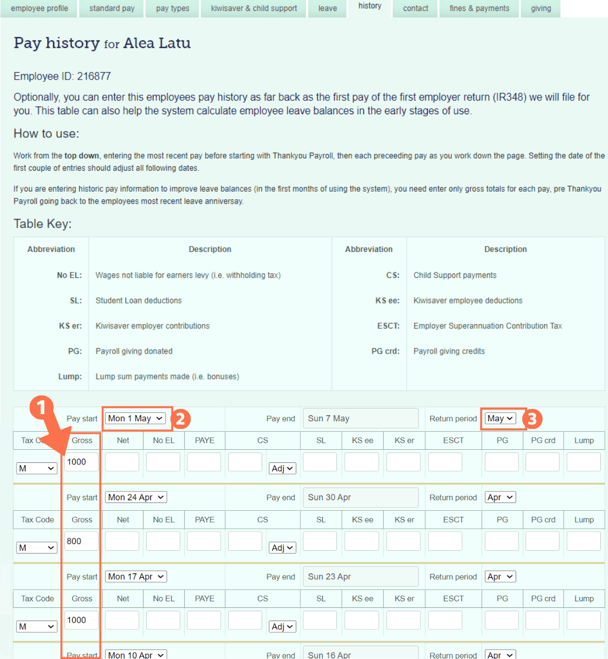
Completing the History Tab
- If you are employing someone for the first time, they will not have pay history with your business, so you can leave this tab empty and move on to the next tab.
- If you are setting up a Casual Employee who receives PAYG, with the leave setting '8% of Gross' - Pay into each pay, the pay history is not needed. Simply move on to the next tab.
- If you are bringing an employee over from another payroll system and they have only had minor changes to their pay since their last leave anniversary, (so they are paid nearly the same, every pay), follow the steps from this example:
- Enter their full gross earnings amount since their last leave anniversary (or since their start date if shorter than 12 months) in the 1st line, as shown in the example.
- The pay start date is the day after their leave anniversary date (or their start date if shorter than 12 months). Please contact the Help Desk to set up this date if you do not have the option to go back that far.
.png?width=688&height=170&name=PayHistory_Gross%20(2).png)
Please contact the Help Desk to update the system if you input the full Gross Total in the first box. There are background settings we need to run to ensure the pay history is applied correctly.
- If you are bringing an employee over from another payroll system and they have had variable pay since their last leave anniversary, please enter their gross pay history back as far as the last leave anniversary as per the example below. This information is needed to calculate their leave accurately.
To calculate accrued leave accurately, you will need to enter gross amounts for each pay period back to their last leave anniversary before coming to this system. On rare occasions, you might need to supply gross totals for the full 52 weeks.
*Please contact the Help Desk if you are unsure how far back you need to go.
For more information on the Pay History Tab, follow this link to our dedicated article.
- Enter the gross amount for each pay into the box as per the example.
- Update the dates for each line to correlate with the pay period entered. Ensure that the last entry's 'pay start date' is the day after the leave anniversary date.
- Check that the return period month is correct. Update if needed.
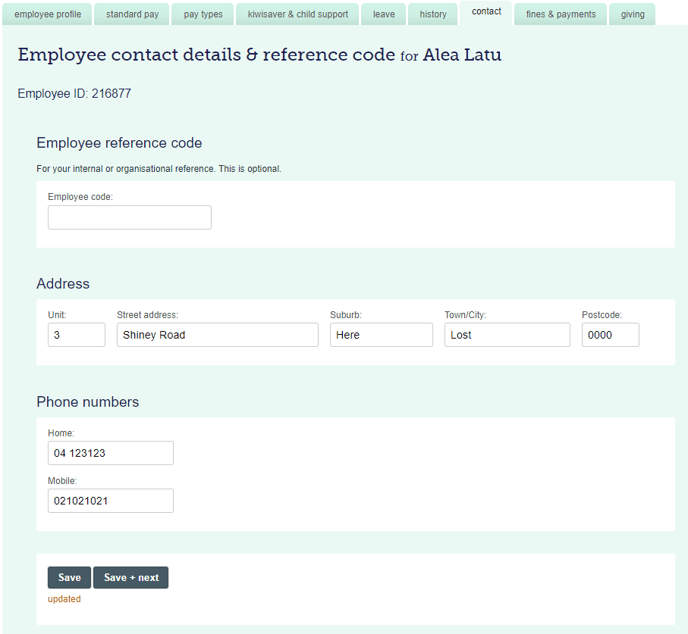
Completing the Contact Tab
The contact tab can be used for internal or organisational reference.
Completing the Fines & Payments Tab
Thankyou Payroll can manage payments for Ministry of Justice fines. For more information on how to do this, please see our article on Payments to the Ministry of Justice.
To find out more about adding Alternative Bank Accounts, follow this link to our dedicated article with rules, usage, and limitations.
Completing the Giving Tab
Payroll Giving is optional but if your employee wishes to donate to a favourite cause or charity then it's as simple as typing in the name of the charity.
Remember to Update the information so that it is saved. You can learn more about payroll giving (and how awesome it is) by following this link.
You are now ready to include this employee in a Pay.
To navigate away from this screen, click on any of the menus at the top of the screen after all the information added has been saved.
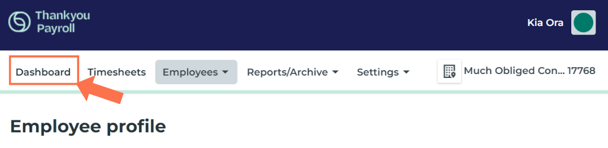
Click on the 'Dashboard' button to load a pay. Here is an article showing you how to load your first pay. Have a look.
Follow this link to set your Pay Day settings to suit your cashflow. Pay days can be updated in each pay run if needed, but it is recommended that you set a default pay day in the system.