Updated: October 2023
What information to have at hand
Before starting, have the following basic information within reach:
- The hours each employee has worked each day for this pay period.
- A record of any leave taken during this time.
- Access to online banking for your business or organisation.
Let's get started
Key information to note on the Dashboard
Click on a button to learn more:
Now that you are familiar with the dashboard, go ahead and click the 'Create a New Pay' button.
Things to check:
You should see the following pay information loaded on your dashboard. Click a button to learn more:
- Check the Pay Day and the Pay Period Starting date for your pay. Update these if needed.
- Toggle on the employees you need to pay from your employee list.
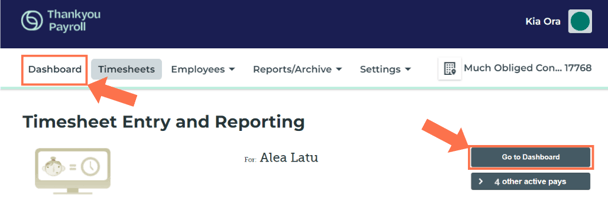
Now that you have a pay loaded on the dashboard with employees added, let's access the employee timesheets to enter the time worked.
Entering timesheet information
Click on the employee's name (one at a time) to go to their timesheet.
Let's have a look at the timesheet:
Enter the employee's work hours for every work day this week.
.png?width=52&height=52&name=Info%20-%20Blue%20Block%20(1).png) If you have filled in the 'default settings for a timesheet row' in the Employee Profile, the system will automatically pre-populate the 'standard pay' row for you based on this.
If you have filled in the 'default settings for a timesheet row' in the Employee Profile, the system will automatically pre-populate the 'standard pay' row for you based on this.
Update and Save the timesheet when you are done.
Click on the next toggled-on employee's name in the list below this timesheet to go directly to their timesheet. No need to return to the dashboard.
Return to Dashboard
Once you have completed all your required timesheets, return to the dashboard by clicking either one of these two buttons to see your funding information.
Click any of these two buttons to return to the dashboard.
Let's have a look at the information you will need to fund this pay:
The last thing to do is check that everything is correct. If you need to add another employee, you can still toggle them on and add them to pays until you press the 'Finalise Pay' button.
If you are satisfied with the pay, press the 'Finalise Pay' button.
This is an example of the pop-up that will appear when you finalise a pay. This pop-up has a summary of the funds to be transferred, as well as the date of the transfer.
You can also access BNZ directly from within this pop-up to do your transfer if you wish.
Simply close the pop-up when done.
All that is left to do is to transfer the funds as indicated on this screen.
Please only use bank transfers (i.e. your bank transfers to our bank) to fund pays.
*Never make cash deposits. These arrive to us with no client information.
Now sit back, put your feet up and we will process your pay for you and file PAYE and deductions with the IRD on your behalf.
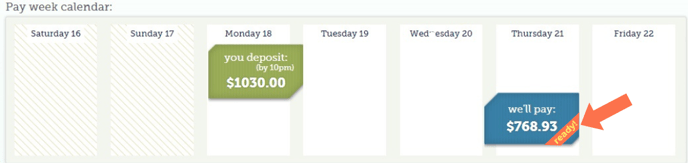
How do I tell my pay is funded?
Once we have received your deposit and tracked it to your account via your client reference number, you will see an orange ribbon show up on the blue 'we'll pay' box.
.png?width=52&height=52&name=Reminder%20-%20Orange%20Block%20(3).png) Reminder - Always include the client reference number in all deposits. If we cannot track your deposit to your account, your pay will not run.
Reminder - Always include the client reference number in all deposits. If we cannot track your deposit to your account, your pay will not run.
If you wish to make a change to the pay before it is processed, you can still do this by clicking the 'Amend this pay' button.

Make your changes to the pay and 'Finalise' the pay again. The pay information in the dashboard will update to include the updated timesheets.
If you transfer more than required or adjust the timesheets so that fewer funds is required, you will see a credit on your dashboard after the pay has been processed.
That is it! You have created your first pay!
Sit back and relax. Easy, wasn't it.