Updated: November 2023
Xero is online accounting software often used by businesses to track/pay bills, claim expenses, send invoices, and reconcile bank transactions. Follow this step-by-step guide to integrate Thankyou Payroll with your Xero account so you can send invoices to Xero and customise your Xero invoicing template.
Where to Start:
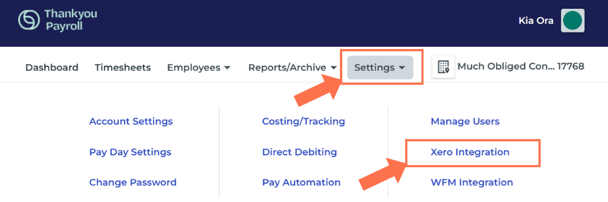
From the dashboard, go to 'Settings' and select 'Xero Integration' from the dropdown menu. This will take you to the Xero integration tab so you can integrate these accounts.
From this page, you will connect to your Xero account. Note: You will be taken out of Thankyou Payroll, to your Xero account for logging in, and then taken back to this Xero Integration page in Thankyou Payroll. Let's look at the steps:
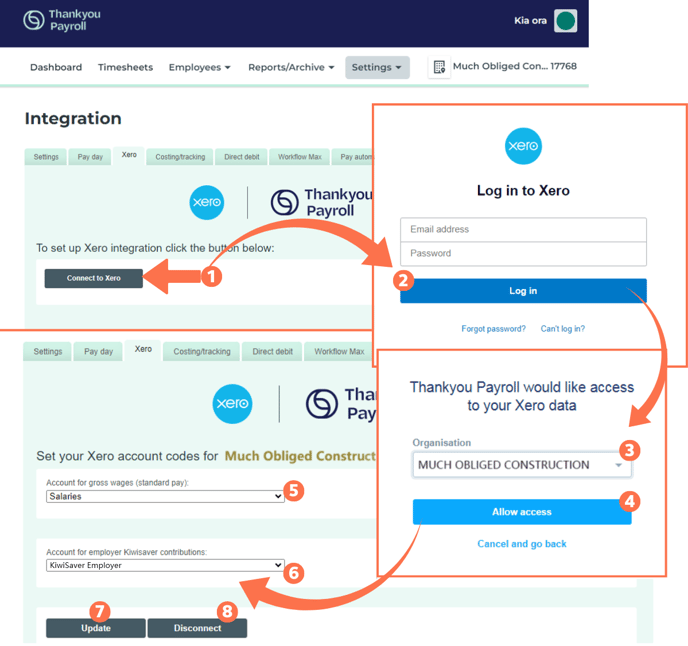
- Click the 'Connect to Xero' button on this Thankyou Payroll Xero Integration page.
- Your Xero screen will open in a new tab, asking you to log in. Log in to your Xero account as usual, using your normal Xero email address and password.
- You will see a notification informing you that Thankyou Payroll wants to access your Xero data. This is expected because you are linking these accounts. Under 'Organisation', click the dropdown menu and select the Xero account you want to link to the Thankyou Payroll account.
- Now click the 'Allow Access' button to link these accounts. This will take you back to the Thankyou Payroll - Xero Integration page you started from.
- Select the Xero account for gross wages data. This tells Thankyou Payroll what your gross wages account is called in Xero. You can use the dropdown menu to find the Xero account you want. Default is usually set to 'Salaries'.
- Select the Xero account for employer KiwiSaver contribution data. This tells Thankyou Payroll what your employer KiwiSaver contribution account is in Xero. Again, use the dropdown menu to find the Xero account you want. It can be the same as the gross wages account selected in Step 5, i.e. 'Salaries'
- 'Update' this setting to set up this Xero integration.
- As a point to note, the 'Disconnect' button will break the connection between this Thankyou Payroll account and Xero. You will have to do the setup over again to re-establish the connection if you press the disconnect button.
.png?width=52&height=52&name=Info%20-%20Blue%20Block%20(1).png) Without further customisation, Thankyou Payroll will send only wages and Kiwisaver information to your selected Xero accounts when prompted. To set up a customised invoice structure, use 'Custom Reports'.
Without further customisation, Thankyou Payroll will send only wages and Kiwisaver information to your selected Xero accounts when prompted. To set up a customised invoice structure, use 'Custom Reports'.
That is it! You have now integrated with Xero. To customise your Costing and Tracking sections of Xero integration, follow this link to our Help Article.